Table of Contents
- Trigger Reset and Take Up: What Actually Happens Inside Your Firearm
- Single Stage vs Two Stage Triggers: Which Design Fits Your Shooting
- Trigger Staging Techniques for Precision Shooting
- How to Improve Trigger Control with Dry Fire Drills
- Troubleshooting Reset Problems: Double Clicks, Mushy Breaks, and More
- Safety and Aftermarket Triggers: What to Know Before You Upgrade
- Conclusion: Putting Trigger Reset Knowledge into Practice
- Frequently Asked Questions
Last Updated: October 6, 2026
Trigger Reset and Take Up: What Actually Happens Inside Your Firearm
Trigger reset is the mechanical process in which the sear re-engages the hammer or striker after a shot, allowing the trigger to be pulled again.
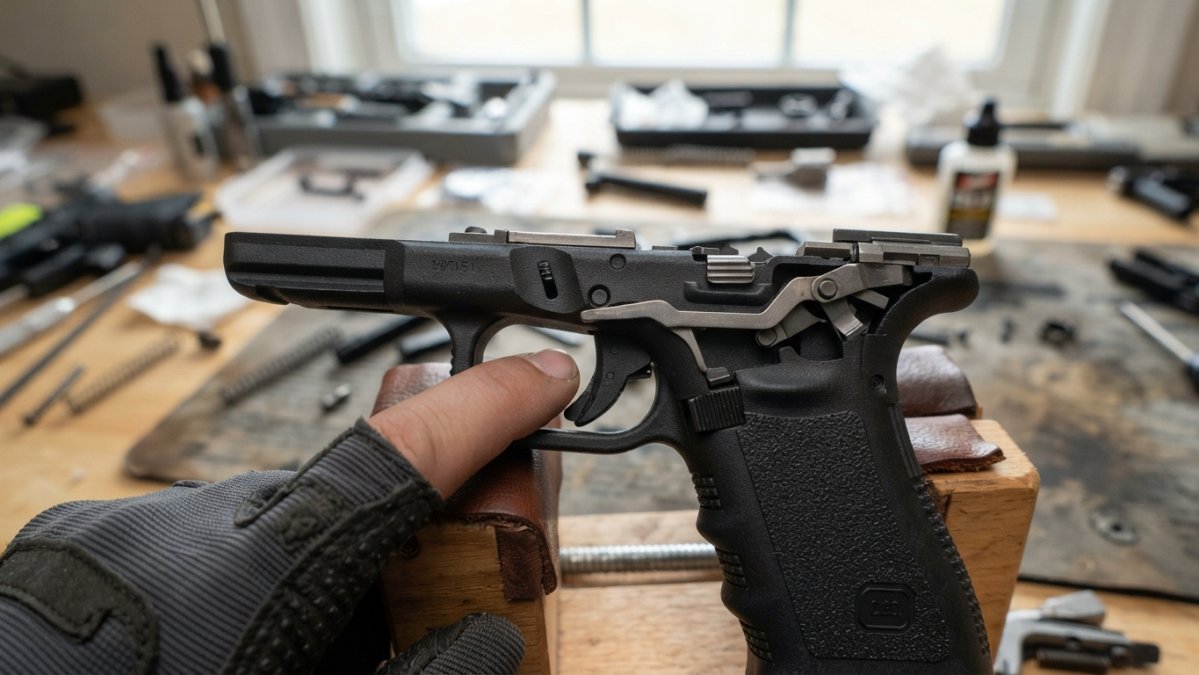
This guide covers the internal geometry, trigger travel stages, and drills that turn reset into muscle memory.
A common mistake is treating reset as a single event. Reset is a sequence: sear release, hammer or striker re-capture, sear engagement, and the tactile and audible click that tells your finger the gun is ready.
The four stages of trigger travel
Every trigger pull, from any platform, moves through the same four phases:
- Take up (slack): free travel before the sear contacts the engagement surface
- Wall: the point where resistance increases sharply
- Break: sear release and the shot
The SAAMI glossary of firearm terminology uses similar stage language when describing trigger function, which is why the terms carry across platforms.
Reset is not the trigger returning to its forward position. It is the sear re-engaging. You can feel the click well before the trigger reaches its rest point, and that click is your signal to fire again.
Single Stage vs Two Stage Triggers: Which Design Fits Your Shooting
A single-stage trigger has one continuous pull weight from take up to break. A two-stage trigger has a light first stage that takes up slack, then a distinct wall before the break.
Single-stage triggers suit defensive and action shooting, where you want a short, predictable pull.
| Trigger Type | Take Up Feel | Best For | Trade-off |
|---|---|---|---|
| Single stage | Minimal slack, one weight | Defensive, action shooting | Less feedback before break |
| Two stage | Light first stage, defined wall | Precision, long-range | Slower on rapid strings |
| Hybrid | Short take up, crisp wall | Competition, mixed use | Requires tuning to preference |
Take up distance and pull weight on a two-stage are set by spring tension and sear geometry.
Trigger Staging Techniques for Precision Shooting
Trigger staging is taking up slack until you reach the wall, then applying final pressure to break the shot without disturbing the sights. At the wall the sear surfaces are already in contact, so the only travel left is the few thousandths of an inch of sear overlap that must release.
Here is how it is taught:
- Take up the slack until you feel the wall. Do not break the shot yet.
- Confirm sight alignment and sight picture.
- Apply steady, increasing pressure until the sear releases.
- Hold the trigger to the rear and follow through.
- Release only to the reset point, not all the way forward.
The mistake most shooters make is releasing the trigger fully between shots, forcing them to re-take the slack every time. Staging at the reset point keeps you inside the wall, ready for the next break.
Reading the wall on different trigger designs
The wall differs by design, so staging technique has to adapt:
- Crisp single-stage (1911/2011 pattern): a hard, almost binary stop. Rest at the wall, then add a few ounces of pressure; the break should surprise you slightly.
- Two-stage (AR-pattern, many precision rifles): a light take-up spring, often 1 to 2 pounds, ends at a distinct wall. Pull through the first stage quickly, then slow at the wall.
- Glock-pattern striker: the wall is softer and moves as the striker spring loads. Feel for the point where resistance stops increasing, then press through.
If your trigger has a long, vague wall, you can still stage it. The wall is a pressure change, not a physical stop. Train your finger to recognize the increase in resistance, not a hard edge. A common drill is to stage, hold for a two-count, then release back to reset without breaking, this isolates the wall from the break.
Drills that build staging into muscle memory
Staging is a feel skill, so it must be trained with repetition. These dry-fire drills build it faster than live fire because you can run hundreds of reps without recoil masking the trigger feel:
- Wall-hold drill: take up to the wall, hold for a two-count, then break. Ten reps per session builds the ability to stop at the wall on demand.
- Reset-to-wall drill: after the break, release only until you feel the reset click, then take up to the wall again. Trains the exact travel window you will use in live fire.
- Blind wall drill: close your eyes, take up to the wall, and open them to check that your sights did not move. Separates trigger feel from visual confirmation.
Run these with a shot timer app to track consistency. The NRA’s guide to dry fire safety covers the safety rules that make dry fire practice safe and effective. Most practitioners find that two weeks of daily ten-minute sessions produces a noticeable improvement in split times and group size, because the finger stops hunting for the wall and starts arriving at it.
Never dry fire without confirming the chamber is clear and the muzzle is pointed in a safe direction. A single lapse in the dry fire routine is how negligent discharges happen. Verify, then verify again.
How to Improve Trigger Control with Dry Fire Drills
Dry fire is the cheapest, fastest way to build trigger control. You do not need ammunition, a range, or a spotter. You need a safe backstop, a clear room, and ten minutes a day.
Three drills that build reset mastery:
- Reset drill: Fire, hold to the rear, release to the click, fire again. Ten reps, both hands, both directions.
- Wall drill: Take up to the wall, hold for a two-count, then break. Builds staging without a live round.
- Balance drill: Place a coin on the front sight or slide. Break the shot without dropping it. Builds a clean, jerk-free press.
Run these with a timer or a shot timer app to track consistency. The NRA’s guide to dry fire safety covers the safety rules that make dry fire practice safe and effective.
Troubleshooting Reset Problems: Double Clicks, Mushy Breaks, and More
Reset problems almost always trace back to one of three subsystems: the sear and its spring, the trigger bar or disconnector, or the return spring that drives the trigger forward.
A double click on reset usually means the sear is not fully re-engaging before the trigger is pulled again.
A mushy break is different: the sear engagement surface is too shallow, or the sear and hammer surfaces are not mating cleanly, so you feel a long, vague press instead of a crisp wall.
| Symptom | Likely Cause | Diagnostic Step | Fix |
|---|---|---|---|
| Double click | Sear not re-engaging | Slow-cycle and listen for reset click | Check sear spring tension and trigger bar timing |
| Mushy break | Shallow sear engagement | Inspect sear/hammer mating surfaces | Adjust engagement or replace sear |
| Dead trigger | Disconnector timing | Verify disconnector drops bar after sear release | Inspect disconnector and bar |
| Long reset | Excess return travel | Measure trigger travel from break to reset | Tune return spring tension or trigger shoe |
| Reset click but no fire | Sear slipping off under load | Check sear angle and spring weight | Replace sear or spring |
A step-by-step diagnostic sequence
When a reset problem shows up, work through it in this order so you do not replace parts that are fine:
- Clear the firearm and remove the magazine. Confirm the chamber is empty before any inspection.
- Slow-cycle the trigger and note whether the reset click is present, absent, or inconsistent.
- Inspect the sear spring for set, kinks, or debris. A weak spring is the most common cause of a sear that will not re-engage.
- Check disconnector timing by watching the trigger bar as the slide cycles. The disconnector should release the bar only after the sear has captured the striker or hammer.
- Measure reset travel with a caliper or against a known-good gun of the same model. A reset noticeably longer than spec points to a return spring or trigger shoe issue.
- Test with dummy rounds before any live fire, function-checking the reset at slow and fast speeds.
If you run a drop-in kit, check compatibility first. A trigger designed for one variant can bind in another. That is why we test our components for fit across the platforms our customers actually build.
A trigger that resets inconsistently is a safety issue, not just a performance one. If the sear does not fully re-engage, the gun can fire on a subsequent pull when you did not intend it to. Stop shooting and diagnose before continuing.
The safety angle most guides skip
Short-reset triggers reduce the margin between “finger on the trigger” and “shot fired”, the trade-off nobody puts in the spec sheet. A trigger with a 0.10 inch reset and a 3-pound pull leaves very little room for a finger still moving when the shooter intended to stop.
This is not a reason to avoid short-reset triggers. It is a reason to train with them until the reset point is automatic, and to function-check them after every cleaning or parts change.
Safety and Aftermarket Triggers: What to Know Before You Upgrade
A shorter, lighter trigger changes more than feel, it changes how much margin you have between “finger on the trigger” and “shot fired.” A short reset and light pull weight demand stricter trigger discipline.
Before you install any aftermarket trigger, confirm three things:
- The trigger is rated for your specific platform and variant
- The sear engagement and disconnector timing are set to factory-safe spec
- You have tested function with dummy rounds before live fire
The ATF guidance on firearm component definitions is worth reading if you are unsure whether a part changes your firearm’s legal classification. Safety and legality both start with knowing what you installed.
At Polymer Pew, our flat triggers and super safety kits are built with hardened stainless internals and anodized aluminum housings, tested for compatibility across common clone platforms.
Conclusion: Putting Trigger Reset Knowledge into Practice
Reset and take up are the two halves of every shot you fire after the first. Learn to feel the wall, stage at the reset point, and dry fire until it is automatic.
If you are upgrading your trigger, start with parts that are tested for your platform. Polymer Pew builds flat triggers, super safety kits, and MKE lowers with hardened stainless steel and anodized aluminum construction, designed for compatibility and reliability.
Frequently Asked Questions
What are the three stages of trigger operation?
The three stages are take-up (initial slack before resistance), break (the point where the sear releases the hammer or striker), and reset (the forward travel needed for the sear to re-engage). Understanding each stage helps you manage trigger control and follow-up shots. Take-up is often called slack, while reset is the mechanical return that prepares the trigger for the next shot.
What is the point of a trigger reset?
Trigger reset allows the sear to re-engage the hammer or striker so the firearm can fire again. Without a full reset, the trigger won’t break for a follow-up shot. A shorter reset distance means less finger movement, which can improve split times in competition or defensive shooting. Mastering reset is key to consistent, fast follow-up shots.
What is the functional difference between take-up and trigger reset?
Take-up is the initial rearward movement of the trigger before it reaches the wall, where resistance increases. Reset is the forward movement after the shot that allows the sear to re-engage. Take-up happens before the break; reset happens after. Both affect how quickly and accurately you can fire subsequent shots, but they involve opposite directions of trigger travel.
How does trigger reset distance affect follow-up shot speed?
A shorter reset distance reduces the amount of finger travel needed to re-engage the sear. This lets you get back on target faster because your finger moves less. Many aftermarket triggers advertise reduced reset distance, which can shave fractions of a second off split times. However, a reset that’s too short may require more precise trigger discipline to avoid accidental discharges.
Why is proper trigger finger placement important for managing take-up?
Proper finger placement, usually with the pad of your index finger centered on the trigger shoe, gives you consistent leverage and control over take-up. If your finger is too far in or out, you may pull the trigger at an angle, causing the shot to drift. Consistent placement helps you feel the wall and reset point more clearly, improving accuracy.
How do aftermarket triggers improve reset compared to factory models?
Aftermarket triggers often use lighter springs, polished sear surfaces, and optimized geometry to reduce reset distance and make it more tactile. Factory triggers can have longer, less distinct resets. Upgraded triggers may also provide a more audible click, helping you know when the sear re-engages. Always test aftermarket parts for compatibility and safety.