Table of Contents
- Why Trigger Upgrades Matter for Pistol Accuracy
- How to Reduce Trigger Pull Weight Safely
- Trigger Reset Distance and Accuracy: The Connection
- Best Drop-In Trigger Kits for Pistols: What to Look For
- Carry vs. Competition: Trade-Offs in Trigger Upgrades
- Installation, Compatibility, and Safety Checks
- Step 1: Confirm Compatibility Before You Disassemble
- Step 2: Record the Baseline
- Step 3: Disassemble Carefully
- Step 4: Install the New Components
- Step 5: Function-Test with Snap Caps
- Step 6: Drop Test
- Step 7: Live-Fire Verification
- Step 8: Document the Result
- Maintenance and Longevity: What Changes After the Upgrade
- Conclusion: Choosing the Right Trigger for Your Goals
- Frequently Asked Questions
Last Updated: October 3, 2026
Why Trigger Upgrades Matter for Pistol Accuracy
Improving pistol accuracy with trigger upgrades starts with a simple truth: the trigger is the only part of the gun your finger touches while the sights are aligned, and that interface decides where your rounds land.
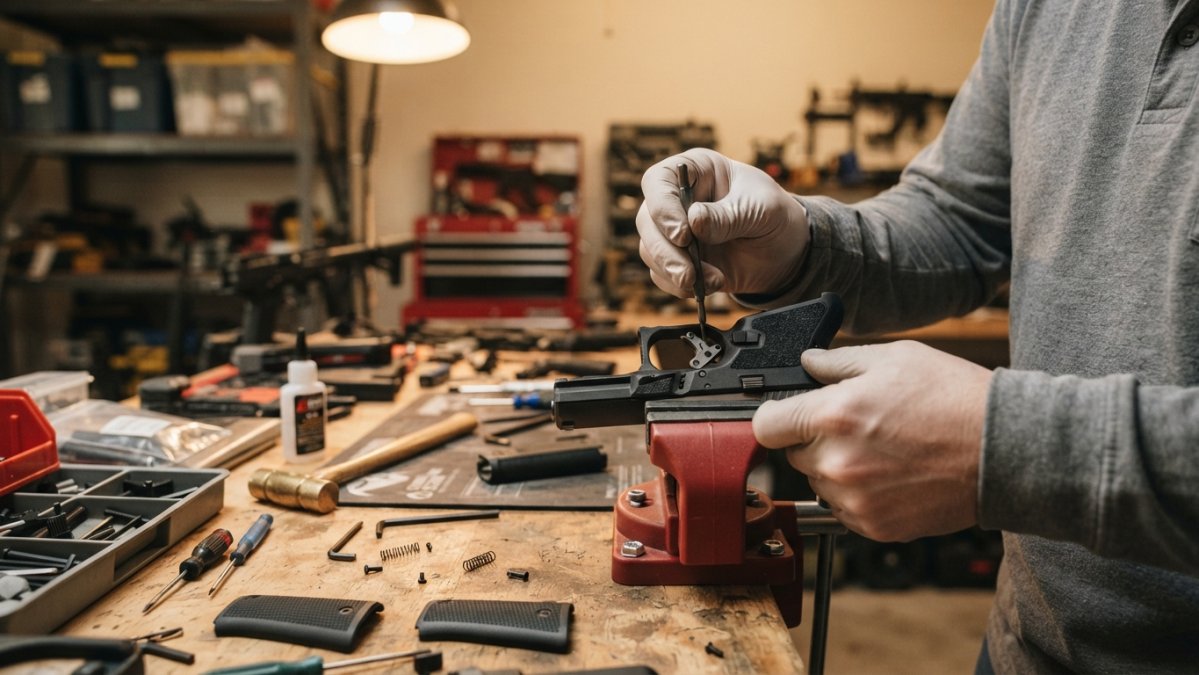
A stock striker-fired trigger ships with a heavy pull, long take-up, and a gritty break, heaviness that exists for liability, not performance.
Trigger pull is the total force required to move the trigger from rest until the sear releases the striker or hammer.
- Take-up: the slack before you hit the wall. Long take-up costs time but adds safety margin.
- Break: the point of release. A crisp break with minimal creep produces tighter groups.
- Over-travel: how far the trigger moves after release. Excess over-travel disturbs sight alignment.
The connection to accuracy is mechanical. A heavy, gritty trigger forces you to move the gun while pressing, showing up as horizontal stringing.
A trigger upgrade doesn’t make you a better shooter. It removes a mechanical obstacle so your existing skill can express itself. If your fundamentals are weak, a match-grade trigger will just show you that weakness faster.
How to Reduce Trigger Pull Weight Safely
Reducing trigger pull weight safely means changing springs and sear engagement geometry in a controlled way, then verifying with a trigger gauge before you load the gun.
A common mistake is chasing a featherweight pull. Competition shooters sometimes run triggers under 3 pounds, but those guns live on a range with strict muzzle discipline.
Here’s the safe sequence we recommend:
- Measure the baseline. Use a trigger gauge and record the average of five pulls. Write it down.
- Identify the friction sources. Check sear engagement, connector angle on striker-fired guns, and spring weight.
- Swap springs first. A lighter trigger return spring and reduced-power striker spring are the cheapest, most reversible change.
- Polish, don’t grind. Light polishing of contact surfaces reduces grit. Removing metal changes geometry and voids safety margins.
- Re-measure and function-test. Confirm the pull weight, then perform a drop test and a full function check with snap caps.
SAAMI industry standards for firearm safety publishes voluntary standards that manufacturers follow for chamber pressure and safety testing.
Never reduce sear engagement below the manufacturer’s minimum. A trigger that “feels great” but has insufficient sear contact can fire on a bump or drop. That’s not a tuning issue, it’s an unsafe gun.
Trigger Reset Distance and Accuracy: The Connection
Trigger reset distance and accuracy connect through split times and follow-through.
During rapid fire, a long reset forces your finger to travel further before the next shot is available, inviting shifted grip pressure, flinch, or lost sight alignment.
This is where muscle memory and hardware meet.
Reset quality matters more for accuracy under speed than pull weight does.
We group trigger performance into three measurable categories:
- Weight: the force to break the shot, measured in pounds.
- Travel: total movement from rest to over-travel stop.
- Reset distance: the forward travel needed to re-arm the sear.
Track all three. Weight alone tells you almost nothing about how a trigger performs.
Best Drop-In Trigger Kits for Pistols: What to Look For
The best drop-in trigger kits for pistols share four traits: verified compatibility with your specific platform and generation, hardened internals, a documented pull weight, and clear installation instructions. Everything else is marketing.
Drop-in doesn’t mean “fits everything.” It means the kit installs without gunsmithing on a stated list of models and generations. The biggest complaint we hear is buying a kit that required filing, fitting, or a gunsmith, a compatibility failure, not a shooter failure.
The Mechanical Variables That Actually Matter
Most buyers compare pull weight and price. The shooters who get the best results compare four things instead:
- Sear engagement geometry. On hammer-fired guns, the sear-to-hammer hook angle controls both break quality and safety margin. A kit that reduces sear engagement to lighten the pull trades safety for feel. Look for kits that publish their engagement spec or retain factory sear geometry.
- Connector angle (striker-fired). On Glock-pattern and similar striker guns, the connector’s bend angle sets the wall and break weight. A “minus” connector (often marked with a “-” or a specific degree) reduces weight; a “dot” or “plus” connector increases it. Kits that ship a connector should state which one and why.
- Pre-travel and over-travel adjustment. Better kits include set screws to tune take-up and over-travel independently. This is where you gain the most usable improvement, a short, positive over-travel stop keeps the sights from being disturbed after the break.
Compatibility Is a Generation Question, Not a Brand Question
“Fits a Glock 19” is not enough information. Gen 3, Gen 4, and Gen 5 have different trigger housings, connector geometry, and slide cover plate interfaces, as do the M&P 1.0 vs. 2.0, the P320 vs. P365 families, and the various 1911/2011 frame sizes. Before you buy, confirm:
- The exact model and generation listed in the kit’s compatibility chart.
- Whether the kit reuses the factory trigger housing or replaces it.
- Whether the kit retains the factory drop safety, firing pin block, and any external safety.
- Whether the kit requires a different trigger bar, sear, or connector to function.
If a manufacturer can’t answer those four questions in writing, treat the kit as fitting-required.
What to Check Before You Buy
| What to Check | Why It Matters | Red Flag |
|---|---|---|
| Stated model and generation compatibility | Prevents binding and fitment issues | “Fits most pistols” with no list |
| Material of internals | Hardened stainless resists wear | Unspecified metal or plastic |
| Documented pull weight and connector spec | Lets you match trigger to use case | No weight or connector published |
| Pre-travel and over-travel adjustment | Lets you tune feel without swapping parts | No adjustment and no spec |
| Safety mechanism retention | Keeps factory safeties functional | Kit bypasses or deletes safeties |
| Installation guide with torque and pin specs | Reduces DIY errors | No instructions included |
Objective Metrics: What to Measure Before and After
Before installing any kit, record a baseline so you can prove the upgrade did something:
- Pull weight: average of five pulls on a trigger gauge, in pounds.
- Reset distance: the forward travel needed to re-arm the sear, measured in inches or millimeters with calipers against a reference point.
- Group size: five-shot groups at 15 and 25 yards from a rest, measured center-to-center.
A kit that drops pull weight by a pound but leaves group size unchanged hasn’t improved accuracy, it’s improved feel.
Our own drop-in options use anodized aluminum housings and hardened stainless steel internals, tested for variant compatibility before they ship.
ATF guidance on firearm parts and modifications is worth reviewing if you’re building or modifying a platform, since some configurations have legal considerations beyond fit and function.
A drop-in kit is only drop-in if it fits your exact model and generation without modification. Verify compatibility in writing, confirm the safety mechanisms are retained, and measure before and after so you can prove the upgrade did what you paid for.
Carry vs. Competition: Trade-Offs in Trigger Upgrades
Carry and competition triggers pull in opposite directions, and the trade-off is deliberate.
For concealed carry, prioritize a clean break and a positive reset over low weight.
For competition, weight and travel both drop. Split times matter, and a short reset with minimal over-travel shaves fractions off every shot.
Most shooters buy a competition trigger for a carry gun and then wonder why they’re nervous handling it.
If you own one pistol and use it for both carry and range work, keep the trigger in carry configuration and train your speed with dry fire. You’ll build more usable skill than you will by lightening a defensive trigger you don’t fully trust.
Ergonomics and trigger geometry matter here too. A flat trigger face changes where your finger contacts the shoe, which changes use and perceived pull weight. Shooters with shorter fingers often find a flat trigger gives more consistent finger placement than a curved one. That’s a geometry win, not a weight win.
Installation, Compatibility, and Safety Checks
Installation is where good components go wrong. A quality kit installed carelessly produces the same result as a cheap kit: unreliable function. Follow the sequence, verify at every step, and document the result as a baseline for future service.
What you’ll need:
- Roll pin punches in the correct sizes for your platform
- A trigger pull gauge
- Snap caps
Step 1: Confirm Compatibility Before You Disassemble
Match the kit to your exact model and generation. On striker-fired pistols, that means confirming the trigger housing, connector, and trigger bar part numbers. On hammer-fired pistols, confirm the sear, hammer, and disconnector interfaces. NRA firearms safety resources covers general handling and safety practices worth reviewing first.
Step 2: Record the Baseline
Before you remove a single pin, measure and write down:
- Average pull weight over five pulls, in pounds.
- Reset distance, measured with calipers from the trigger’s rest position to the point where the sear re-engages.
- Over-travel distance, measured the same way past the break.
Without a baseline, you can’t tell whether the new trigger improved accuracy or just changed the feel.
Step 3: Disassemble Carefully
Capture every spring, pin, and detent. Losing a detent spring mid-install is the most common DIY setback, and on many striker-fired platforms the trigger return spring and plunger are the easiest parts to launch across the room. Work inside a tray or clear plastic bag when compressing springs.
Step 4: Install the New Components
Seat pins fully and confirm the safety mechanism engages and disengages correctly. On striker-fired guns, verify the firing pin block still moves freely and blocks the striker when the trigger is at rest. On hammer-fired guns, verify the hammer hooks and sear still engage with full contact and that the disconnector resets.
Step 5: Function-Test with Snap Caps
Cycle the action at least twenty times and confirm:
- The trigger returns fully to its rest position every time.
- The reset is positive and audible or tactile.
- The safety engages and disengages with the trigger in both the at-rest and partially-pulled positions.
Step 6: Drop Test
With the gun unloaded and no magazine inserted, and with snap caps in the chamber if your range allows, perform a drop test from a safe height onto a padded surface. The gun must not fire. If it does, the sear engagement is insufficient and the gun is unsafe. Stop and reinstall the factory components.
Step 7: Live-Fire Verification
Start with a few rounds at close range. Check grouping against your baseline. Confirm the pull weight with your gauge and re-measure reset and over-travel. If group size got worse, the trigger geometry or your finger placement changed, not the gun’s inherent accuracy.
Step 8: Document the Result
Record the new pull weight, reset distance, over-travel, and group size. This is your new baseline. It tells you when the trigger has worn enough to need service.
Maintenance and Longevity: What Changes After the Upgrade
Aftermarket triggers change the service life of the parts around them. A few patterns worth knowing:
- Hardened stainless internals hold up far better than softer factory metals, but they wear the parts they contact. Inspect the sear and connector surfaces every 2,000 to 3,000 rounds.
- Lighter springs fatigue faster than factory springs. Replace trigger return and striker springs on a schedule, commonly every 5,000 rounds for range guns, sooner for high-volume competition guns.
- Adjustable set screws can walk under recoil. Check pre-travel and over-travel screws every few range sessions and re-torque to spec.
Clean the trigger group when you clean the rest of the gun. Inspect sear surfaces for wear, re-measure pull weight periodically, and keep a log. Tracking your numbers tells you when to replace parts before they cause a malfunction, the difference between a maintenance schedule and a surprise at the range.
If you only do one thing after installing a trigger, do this: re-measure pull weight and group size at the same distance and from the same rest you used for your baseline. That single comparison tells you whether the upgrade improved accuracy or just changed the feel.
Conclusion: Choosing the Right Trigger for Your Goals
The hard part isn’t finding a trigger. It’s matching the trigger to what you actually do with the gun. A carry pistol and a competition pistol need different answers, and a budget build needs a kit that fits without gunsmithing.
At Polymer Pew, we build for that reality. Our drop-in kits use anodized aluminum housings and hardened stainless steel internals for durability, our components are tested for variant compatibility so they fit your build the first time, and we keep pricing accessible for shooters upgrading on a budget.
Get your Flatties here and build the trigger your platform deserves.
Frequently Asked Questions
Do aftermarket triggers really make a pistol more accurate?
Aftermarket triggers can improve practical accuracy by reducing trigger pull weight, shortening reset, and minimizing creep, which helps you fire without disturbing sight alignment. Mechanical accuracy of the barrel and slide remains unchanged, but a better trigger makes it easier to shoot to the pistol’s potential. Many shooters see tighter groups because they flinch less and follow through more consistently.
What are the benefits of a flat-faced trigger vs. a curved trigger?
A flat-faced trigger provides a consistent surface for your finger, which can improve leverage and reduce perceived pull weight. It also encourages a straight rearward press, minimizing sideways deflection. Curved triggers may suit those who prefer a traditional feel. The choice often comes down to hand size and personal preference, but flat triggers are popular in competition for their repeatability.
How does trigger pull weight affect handgun accuracy?
A lighter trigger pull can reduce the force needed to fire, lessening the chance of pulling your shots off target. However, too light a pull may be unsafe for carry. For accuracy, a smooth, consistent pull weight is important, while competition guns may go lighter. Always balance performance with safety and reliability.
Is a drop-in trigger kit worth the investment for a carry pistol?
Yes, if it improves shootability without compromising safety. A quality drop-in kit can reduce trigger pull weight and reset distance, making follow-up shots faster and more accurate. For carry, prioritize kits that retain all safety mechanisms and have a proven track record. Avoid overly light triggers that could lead to accidental discharges under stress.