Last Updated: November 16, 2026
Quick Summary
MP5 clone lower fit issues happen because the upper receiver is the serialized part, so each clone maker builds its lower around its own upper’s dimensions, and small differences in pin hole locations, trigger housing pocket width, and welded blocks cause binding. A lower that fits one clone can fail on another, so match the lower to your upper’s maker and pattern generation before buying.
- Identify your upper’s maker and pattern generation before buying any lower.
- Measure pin hole spacing center to center, not edge to edge.
- A full-size lower will not fit a compact upper, full stop.
- Dry fit the lower to the upper with no pins and stop at the first pin that will not go in by hand.
- If a pin will not seat with light hand pressure, do not drive it.
Table of Contents
- Why MP5 Clone Lower Fit Issues Happen in the First Place
- MP5 clone lower compatibility: Match the Lower to the Upper Before You Buy
- MP5 Lower Housing: What the Trigger Housing and Grip Frame Actually Control
- ASD MP5 Lower and Lee Sporting MP5 Lower: Model-Specific Fit Notes
- A Safe Diagnostic Sequence for Fitment Issues
- Interference Points: Welded Blocks, Machined Slots, and Screw Alignment
- Loose Fit vs. Interference: Separating Cosmetic Play From Real Problems
- When to Stop and Call a Gunsmith
- Frequently Asked Questions
Why MP5 Clone Lower Fit Issues Happen in the First Place
MP5 clone lower fit issues trace back to one fact: the upper receiver is the serialized, regulated part, so every clone maker builds its lower around its own upper’s dimensions.
The MP5-pattern firearm was never designed as a modular platform. Original guns were matched assemblies. Clones are not. Each manufacturer reverse-engineered the geometry, and small choices stack up:
- Pin hole locations drilled to slightly different depths
- Trigger housing pocket cut to different widths
- Welded blocks placed by hand, not by fixture
A lower that fits one clone perfectly can bind on another. That is not a defect in either part. It is the cost of a platform built from mixed lineages.
Pattern Generations and Why One Lower Fits Two Clones But Not a Third
Clone makers copy different generations of the original design. Early-pattern and late-pattern guns differ in the trigger housing group, the ejector, and how the lower attaches. A lower cut for one generation can fit two clones that share that lineage and fail on a third that copied a different era.
Before you buy anything, identify which pattern your upper follows. If you are stuck on that step, our MKE clone lower compatibility guide walks through matching a lower to an upper by generation.
MP5 clone lower compatibility: Match the Lower to the Upper Before You Buy
MP5 clone lower compatibility comes down to four checks you can do before spending a dime.
- Identify the upper’s maker and pattern generation. Check the receiver markings and the ejector style.
- Confirm pin hole spacing. Measure center to center, not edge to edge.
- Check the trigger housing pocket width. A pocket cut narrow will not accept a wider housing.
- Ask the lower’s maker what uppers it was cut against. A good maker knows.
Most fitment problems start with a purchase made on looks alone. A lower is not a cosmetic part. Treat the spec sheet like a contract.
Full-Size vs. Compact Pattern Differences
Full-size and compact variants do not share lower geometry. The compact pattern shortens the receiver and shifts the relationship between the trigger housing and the rear of the gun. A full-size lower will not fit a compact upper, full stop.
If you are building a compact variant, confirm the lower is cut for that pattern specifically. Our MKE lower receiver compatibility guide covers the current fitment picture by model.
MP5 Lower Housing: What the Trigger Housing and Grip Frame Actually Control
The MP5 lower housing is the trigger housing and grip frame combined, and it controls three things: trigger geometry, hammer and sear placement, and how the whole group locks to the upper. Get the housing wrong and nothing downstream works right.
- Holds the trigger group in correct relation to the bolt
- Locates the ejector so it lines up with the ejector channel
- Provides the attachment points where pins and screws lock the lower to the upper
That third job is where most fit issues live. If you want to see what a properly cut housing looks like, browse our polymer housing options as a reference point.
ASD MP5 Lower and Lee Sporting MP5 Lower: Model-Specific Fit Notes
Aftermarket lowers are not interchangeable, even when they look alike. The ASD MP5 lower and the Lee Sporting MP5 lower each target specific clone patterns, and each has its own fit quirks. This is a qualified reference, not a guarantee: clone makers revise uppers without notice, and a lower that fits one production run can bind on the next.
Check your upper’s pattern first, then pick the lower cut for it. Our aluminum MP5 housing lineup shows the options side by side.
A Qualified Compatibility Reference by Lower Type
Watch out: a listing that says “fits MP5 clones” without naming a pattern generation is not a compatibility statement. Ask the maker what upper the lower was cut against.
Pattern Identification Before You Order
To identify your upper’s pattern, check the receiver markings, the ejector style, and the shape of the trigger housing pocket. Our MKE clone lower compatibility guide walks through matching a lower to an upper by generation.
A Safe Diagnostic Sequence for Fitment Issues
Work through fitment problems in a fixed order and stop at the first failure. This avoids the classic mistake: filing on a part before you know where the interference actually is.
- Strip the gun. Remove the bolt group and anything that can move.
- Dry fit the lower to the upper with no pins. Does it seat flush by hand?
- Check the front first. If it rocks, the front attachment point is the problem.
- Check the rear. Look for a gap or a bind at the rear tab.
- Install one pin at a time. Stop at the first pin that will not go in by hand.
- Mark the contact point. Use layout fluid or a marker, never force it.
- Measure before you touch anything. Calipers on pin spacing and pocket width.
If a pin will not seat with light hand pressure, do not drive it. That is how you crack a housing or wallow out a hole.
Go/No-Go Checks at Each Step
A diagnostic sequence is only useful if you know what counts as a pass. Use these criteria at each stage.
- No-pin dry fit: The lower should seat by hand with no rocking and no gap greater than a few thousandths of an inch at either end. A visible gap at one end means the opposite end is sitting proud.
- Front pin: Should start by hand and seat with light pressure from a brass punch. If it needs a hammer, stop.
- Rear pin: Same standard. If the front pin seats and the rear does not, the rear tab or the pin hole location is the interference point.
Watch out: resistance at the rear does not always mean the rear is wrong. Builders feel a bind at the rear and file it when the real interference is at the front. Mark both ends before you remove any material.
Separating Cosmetic Fit From Functional or Safety Problems
Cosmetic play is small side-to-side or vertical movement with the gun assembled. It feels sloppy but does not affect function. Many clones have some play from the factory. It is annoying, not dangerous.
When to Stop and Refer to a Gunsmith
Stop work and get a gunsmith when any of these are true:
- A pin will not seat with light hand pressure
- You see cracks forming at a pin hole or the rear tab
- The ejector tip does not line up with the bolt head
A gunsmith can measure what you cannot and fix what you should not. A cracked housing is a paperweight. A few dollars of professional time beats a ruined build.
How to Document and Report a Fitment Issue
If a part is out of spec, a record is how you get support from the maker. Before you contact anyone, assemble a file:
- Model identification: Upper maker, pattern generation, and lower maker with part number.
- Photos: The interference point with layout fluid applied, the pin holes, and the rear tab.
- Measurements: Pin spacing center to center, pocket width, and any gap you measured with calipers.
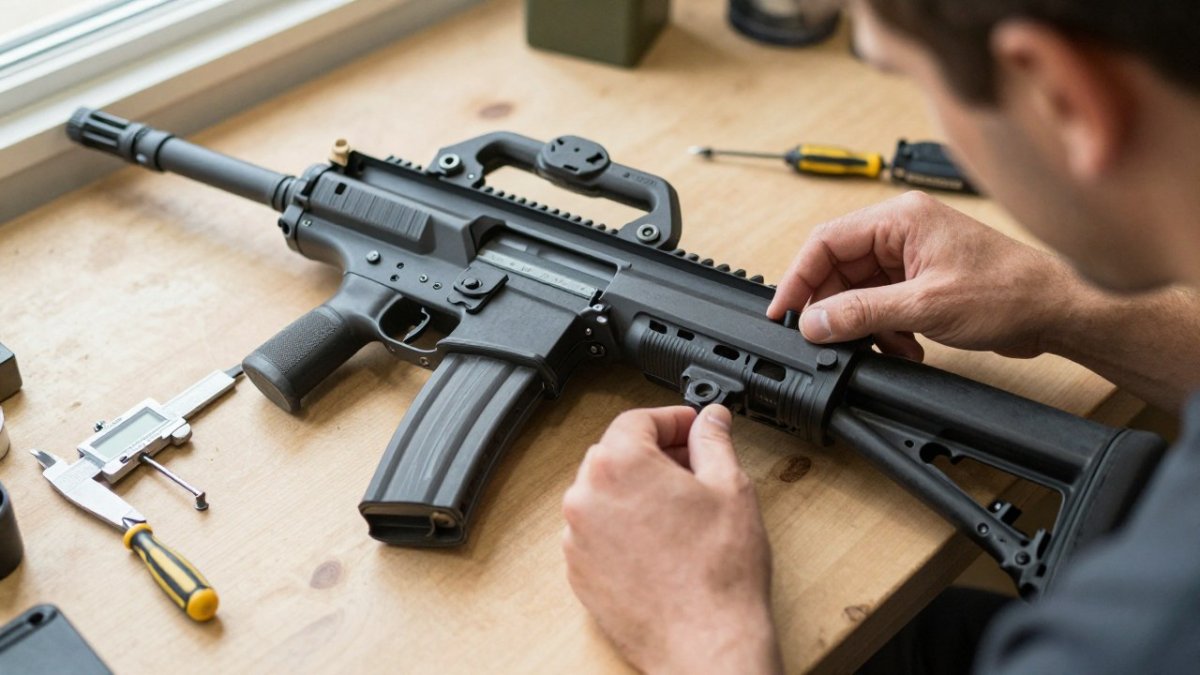
Tools to Have on the Bench
- Digital calipers for pin spacing and pocket width
- Layout fluid or a fine marker to mark contact points
- A brass punch and light hammer for pin checks
If you are setting up a bench for the first time, our essential trigger installation tools guide lists the full kit.
Here is the go/no-go standard for each stage of the diagnostic sequence.
| Check | Pass standard | If it fails |
|---|---|---|
| No-pin dry fit | Seats by hand, no rocking, no gap over a few thousandths | Opposite end is sitting proud |
| Front pin | Starts by hand, seats with light brass punch pressure | Stop; do not hammer |
| Rear pin | Same standard as front pin | Rear tab or pin hole location is interference point |
| Screw alignment | Screws thread by hand until they seat | Lower is sitting off; do not oval holes |
| Function check | Cycles by hand, ejector tip lines up, trigger group does not bind | Stop and refer to a gunsmith |
Interference Points: Welded Blocks, Machined Slots, and Screw Alignment
Interference almost always shows up in the same three places. Check these before you blame the lower.
Welded blocks. Clone uppers use welded blocks to build up material where the original had it.
Machined slots. The clearance slot for the ejector and the trigger group must be cut deep enough.
Screw alignment. If the mounting screw holes do not line up, the lower is sitting off.
Loose Fit vs. Interference: Separating Cosmetic Play From Real Problems
Cosmetic play is small side-to-side or vertical movement with the gun assembled. It feels sloppy but does not affect function. Many clones have some play from the factory. It is annoying, not dangerous.
When to Stop and Call a Gunsmith
Stop work and get a gunsmith when any of these are true:
- A pin will not seat with light hand pressure
- You see cracks forming at a pin hole or the rear tab
- The ejector tip does not line up with the bolt head
A gunsmith can measure what you cannot and fix what you should not. A cracked housing is a paperweight. A few dollars of professional time beats a ruined build.
Fit issues on a clone build are frustrating, but they are almost always solvable with the right sequence and the right parts. At Poly Pew, we build our aluminum MKE lowers and trigger components to fit common clone patterns, with the tolerances checked before they ship.
Frequently Asked Questions
Why does my MP5 clone lower receiver not fit?
The most common causes are pattern mismatch, out-of-spec tolerances on either the lower or the upper, and interference at the welded block or mounting screw holes. Clone manufacturers do not all work from identical drawings, so a lower that fits one build may not seat on another. Before touching anything, confirm the model and pattern of both halves, then check for contact points with the parts assembled dry. If the lower will not seat with light hand pressure, stop and identify the interference rather than forcing it.
Are MP5 clone lower housings interchangeable between models?
Not universally. Full-size and compact variants use different geometry, and even within the same size class, clone makers vary in receiver dimensions and attachment points. An MP5 lower housing that drops onto one manufacturer’s upper may need fitting on another. Check compatibility with the specific clone model and lower maker before purchase. Where a maker publishes a compatibility matrix, use it. Where they do not, ask their support team directly and get the answer in writing.
How do I check whether an aftermarket MP5 lower is compatible with my clone?
Start with model identification: confirm the exact clone make and variant, then match it against the lower maker’s stated compatibility. Do a dry assembly with no ammunition present, checking that the mounting screws align, the retaining tab engages, and the ejector channel clears the bolt head. Look for scratches or witness marks after removal, since these show where contact is happening. If the lower seats with light pressure and the action cycles by hand, you have a functional fit. Any binding means stop and reassess.
When should I stop troubleshooting and contact a qualified gunsmith?
Stop immediately if you see cracks, deformed pins, or evidence of the lower shifting under recoil, and stop if the action binds even after correct assembly. Also stop before any modification that removes material from a stress area or alters the ejector, since those changes affect safe function and are difficult to reverse. Document what you observed, including photos and the exact clone model and lower part number, then hand it to a gunsmith. Cosmetic looseness is a different conversation from a functional or safety problem, and only a qualified inspection can tell them apart.