Table of Contents
- Why Super Safety Tuning Matters for Reliability
- How the Super Safety Mechanism Works
- Super Safety Compatibility: What Fits and What Doesn’t
- Spring Weight, Buffer Weight, and Cycle Rate Synergy
- Super Safety Maintenance: Inspection and Lubrication Points
- Super Safety Troubleshooting: Common Malfunctions and Fixes
- Comparison: Super Safety vs. Other Trigger Systems
- Safety and Legal Considerations
- Frequently Asked Questions
Last Updated: October 20, 2026
Why Super Safety Tuning Matters for Reliability
Reliability is the sum of clearances, spring rates, and timing that either work together or fight each other. Advanced super safety tuning for reliability means dialing in those variables so the mechanism resets predictably on every shot.
The gap between a kit that runs and one that runs every time comes down to three things: sear engagement, buffer and spring balance, and friction control at the contact points.
Most “failed” super safety kits are not defective. They are mistimed, over-sprung, or under-lubricated. Tune the interface before you replace the part.
How the Super Safety Mechanism Works
The super safety is a mechanical reset system: a rotating safety cam interrupts and restores trigger function, relying on the disconnector and sear to re-engage at the correct point in the cycle.
Here is the order of operations that matters:
- The bolt carrier group travels rearward, cocking the hammer.
- The disconnector catches the hammer and holds it until the trigger is released.
- The safety cam rotates to block or permit sear engagement.
- The trigger resets against spring tension and re-engages the sear.
Any slop in that chain shows up as a dead trigger, a doubled reset, or a light strike. A common mistake is adjusting the safety cam before checking disconnector timing, which masks the real problem.
Sear Engagement and Disconnector Timing
Sear engagement is the overlap between the trigger sear and the hammer notch, and it must be positive but minimal. Too much creates a heavy, gritty pull; too little lets the hammer follow the bolt or drop on reset.
Check timing with the upper removed and the hammer under spring tension, cycling the safety slowly while watching the disconnector. It should release the hammer only after the sear has full purchase; early release is a timing problem, not a spring problem.
Super Safety Compatibility: What Fits and What Doesn’t
Super safety compatibility comes down to three interfaces: the lower receiver’s fire control pocket, the bolt carrier group’s trip surface, and the safety selector channel. A kit that fits one clone lower may bind in another by a few thousandths of an inch.
Our aluminum full-size MKE lower receivers are tested for variant compatibility precisely because that pocket geometry varies between clones. Before installing, verify:
- The safety selector rotates freely through all positions with the kit installed.
- The bolt carrier group has a trip surface that engages the safety cam without dragging.
- The trigger pin holes are true and not oversized from prior use.
Lower Receiver and Bolt Carrier Group Checks
Drop the bolt carrier group in without the buffer and spring and cycle it by hand. It should move without contacting the safety cam in the fire position; resistance means the cam sits too high or the trip surface is out of spec.
Precision tolerance mapping is where most builds fail. Measure the fire control pocket depth against your kit’s housing: one that sits proud binds the selector; one that sits too deep fails to engage the disconnector.
Installing a super safety kit into an untested clone lower without checking pocket depth is the fastest way to a binding selector and a wasted range trip. Measure first, install second.
Spring Weight, Buffer Weight, and Cycle Rate Synergy
Cycle rate is governed by the balance between spring tension, buffer weight, and gas or recoil impulse, and a super safety amplifies any imbalance because it adds a mechanical reset step. A system that runs fine with a standard trigger can short-stroke or bounce once the safety cam is in the loop, so measure the buffer and spring interaction instead of guessing.
The Cycle as a Timing Problem, Not a Parts Problem
Break the firing cycle into four measurable phases and tune each one against the others:
- Unlock and extraction, the bolt must stay locked long enough for pressure to drop. Too light a buffer lets the carrier move early; too heavy delays unlock and can short-stroke.
- Rearward travel and hammer cocking, the carrier must travel far enough to fully cock the hammer and let the disconnector catch it. Weak action springs and light buffers let it bottom out hard; heavy springs stop it short of full cocking.
- Dwell and return, the action spring drives the carrier forward. Spring free length and rate determine how much energy is available to strip and chamber the next round.
- Lockup and reset, the super safety cam and disconnector re-engage here. If the carrier is still bouncing when the trigger resets, you get a light strike or a dead trigger on the next shot.
Buffer Weight and Spring Rate: The Trade-Off Table
Use this as a starting map, not a prescription. Change one variable per range session.
| Variable | Too Light | Too Heavy | What You Will See | First Adjustment |
|---|---|---|---|---|
| Buffer weight | Bolt bounce, harsh unlock, case-head smearing | Short stroking, weak ejection, failure to lock back | Light strikes on second round; erratic ejection | Step up one buffer weight class before touching springs |
| Action spring rate | Bolt bounce, timing drift, carrier slams | Short stroking, sluggish return | Inconsistent cyclic rate; failures to feed | Replace with a fresh spring of the same rate before changing weight |
| Hammer spring | Light strikes, unreliable reset | Heavy, gritty pull, slow cycle | Misfires or sluggish reset | Only after buffer and action spring are stable |
Two rules keep this manageable. First, replace worn springs before you change weights, a tired action spring mimics a too-heavy buffer and sends you chasing the wrong variable. Second, tune the buffer first, the action spring second, and the hammer spring last, since the hammer spring has the smallest effect on cycle timing and the largest on trigger feel.
Measuring Cycle Timing Without a Lab
These field checks catch most timing problems without instrumentation:
- Ejection pattern test. Fire a five-round string and note where cases land. A consistent pile means the cycle is stable; a wide scatter means the buffer and spring are fighting each other.
- Lock-back check. With one round in the magazine, confirm the bolt locks back. Failure to lock back is the clearest sign of short stroking and points to too-heavy a spring or buffer.
- Bench reset test. With the upper removed and the hammer under spring tension, cycle the safety by hand. The disconnector should release the hammer only after the sear has full purchase; a mushy reset or hammer follow means the timing is off before you fire a shot.
Log buffer weight, spring type, and ejection pattern for every range session. Three data points tell you more about cycle timing than an hour of guessing at the bench.
Bolt bounce shows up as a light primer strike on the second round of a string and worsens as the buffer lightens. A heavier buffer and fresh action spring usually solve it without touching the trigger group, but change them one at a time and confirm with the field checks above.
Super Safety Maintenance: Inspection and Lubrication Points
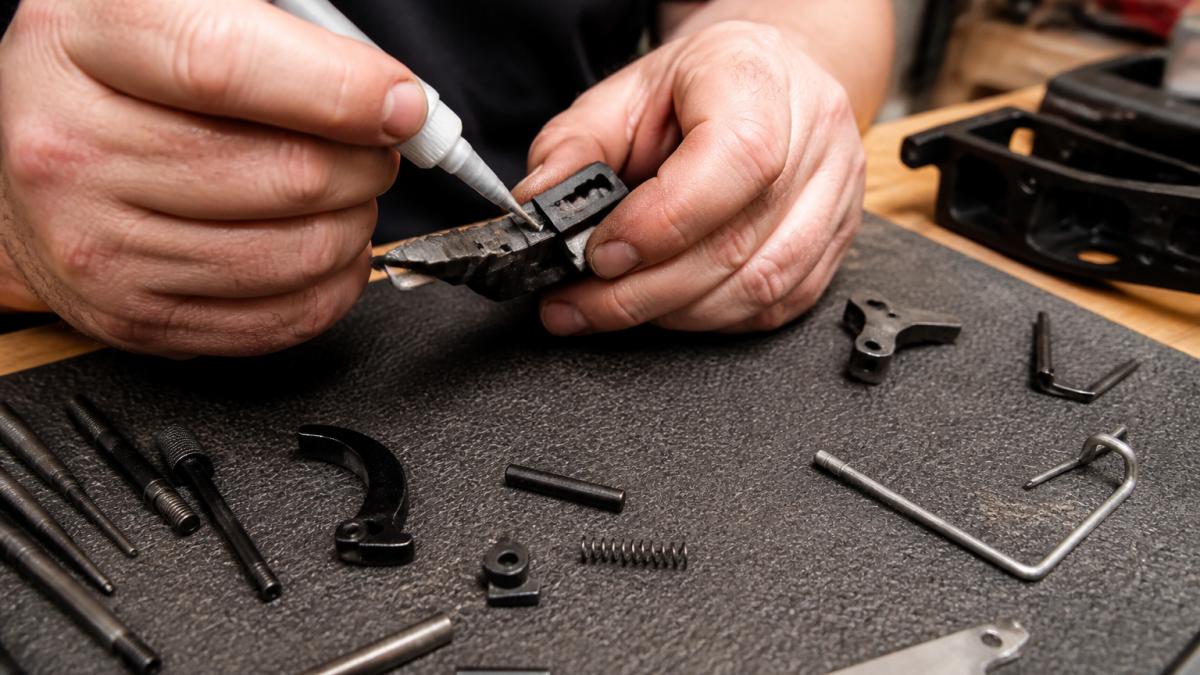
Super safety maintenance is a scheduled inspection routine, not a reaction to a malfunction. Tuned systems drift because parts wear and lubricant migrates. The useful question is what wear looks like at each contact point and how to catch it before it changes your timing.
Wear Mechanisms at the Contact Points
Each interface in a super safety system fails in a characteristic way. Match the wear pattern to the mechanism:
| Contact Point | Dominant Wear Mode | What Drift Looks Like | Inspection Cue |
|---|---|---|---|
| Safety cam and selector channel | Adhesive wear and galling | Selector feels gritty or catches mid-throw | Bright smears or transfer marks on the cam face |
| Sear and hammer notch | Abrasive wear and rounding | Trigger pull gets lighter or creepier over time | Rounded sear edge; polished notch face |
| Disconnector tip | Fatigue and peening | Reset timing shifts; occasional dead trigger | Flattened or mushroomed tip |
| Trigger and hammer pins | Clearance wear in the receiver | Pin holes elongate; pins walk | Visible ovality in the pin holes |
| Buffer and action spring | Fatigue and corrosion | Short stroking; inconsistent cyclic rate | Flat spots, loss of free length, surface rust |
Hardened stainless internals resist galling better than softer alloys, and anodized aluminum housings hold dimensions longer than bare aluminum, but neither eliminates wear, they change how fast it progresses.
Lubrication: Film, Not Grease
Use a quality lubricant sparingly. Over-lubrication attracts debris and changes the friction characteristics you tuned around. Wipe and reapply rather than adding on top of old lubricant.
- Safety cam and selector channel: light film of lubricant, no grease buildup.
- Sear and hammer notch: clean and dry, inspect for rounding or galling.
- Disconnector tip: light oil, check for wear that changes timing.
The sear and hammer notch run deliberately dry: lubricant there collects grit and accelerates the rounding you are trying to prevent.
A Round-Count Inspection Schedule
Wear is a function of round count, not calendar time. Tie inspections to the log:
- Every range session: visual check of the safety cam and selector channel; confirm the selector throws cleanly.
- Every few hundred rounds: inspect the disconnector tip and sear edge for rounding or peening; check pin holes for ovality.
- At each barrel or bolt service interval: replace the action spring and inspect the buffer for flat spots, regardless of how the system feels.
Keep a log of your round count and inspection dates. Wear patterns emerge over hundreds of rounds, and a written record tells you when a part is drifting before it fails at the range.
If you find galling on the safety cam or rounding on the sear, replace the part rather than polishing it back into shape. Recontouring a hardened surface removes the case that resists wear and shortens the part’s life.
The goal of maintenance is not to keep the system looking new but to keep the timing you tuned stable across thousands of rounds, which means knowing what each contact point looks like healthy and what it looks like starting to drift.
Super Safety Troubleshooting: Common Malfunctions and Fixes
Super safety troubleshooting starts with isolating whether the fault is in the trigger group, the buffer system, or the ammunition.
| Symptom | Likely Cause | Fix |
|---|---|---|
| Dead trigger after reset | Disconnector timing or weak spring | Recheck timing, replace spring |
| Doubled reset | Sear engagement too shallow | Increase sear overlap slightly |
| Light primer strikes | Bolt bounce or weak hammer spring | Heavier buffer, fresh hammer spring |
| Binding safety selector | Housing proud of pocket or debris | Check pocket depth, clean channel |
| Failure to feed | Short stroking from heavy spring | Step down spring or buffer weight |
If a tuned system fails, clear it the same way every time so you can reproduce the fault. A malfunction you cannot reproduce is one you cannot fix.
A common mistake is swapping multiple parts at once after a failure. Change one variable, test, then change the next.
Comparison: Super Safety vs. Other Trigger Systems
Super safety systems differ from conventional drop-in triggers in one fundamental way: they add a mechanical reset stage that conventional triggers do not have. That changes the tuning priorities.
| Feature | Super Safety System | Conventional Drop-in Trigger |
|---|---|---|
| Reset mechanism | Mechanical cam and disconnector | Sear and disconnector only |
| Tuning focus | Timing and spring balance | Pull weight and creep |
| Compatibility sensitivity | High, pocket geometry matters | Moderate |
| Maintenance | Scheduled inspection of cam and sear | Occasional lubrication |
| Best for | Builders wanting controlled reset | Shooters wanting a clean pull |
Conventional triggers are simpler to install and more forgiving of receiver variance. For a drop-in upgrade with less tuning overhead, a conventional flat trigger is easier; for controlled reset behavior, the super safety is worth the setup time.
Our specialized super safety kits and flat triggers are built around hardened stainless internals and anodized aluminum housings, which hold their dimensions better than softer materials as round counts climb.
Safety and Legal Considerations
Safety and legal considerations come before tuning.
Before you install or tune any fire control component:
- Verify the device is legal to possess and install where you live.
- Confirm the platform is configured so it cannot function in a manner prohibited by law.
- Follow all applicable federal, state, and local regulations.
Tuning work should always be done with the firearm unloaded, in a safe direction, with ammunition stored separately. Function checks happen on a cleared firearm.
Never tune a fire control group with live ammunition in the same room. Function checks are done on a cleared firearm, every time, no exceptions.
Reliability is a discipline, not a part number. Builders who get consistent results measure before they install, change one variable at a time, and log what they learn.
Frequently Asked Questions
What does super safety tuning mean?
Super safety tuning means adjusting the interaction between the trigger, disconnector, sear, and springs so the safety mechanism resets predictably on every shot. It covers spring tension, sear engagement, and lubrication points, not just bolting parts on. Tuning is what separates a kit that runs from one that binds or doubles.
How can you assess the reliability of a super safety setup?
Run a structured reliability test: cycle the action by hand, then live-fire in short strings while watching ejection pattern and trigger reset. Track any failure to reset, light primer strikes, or bolt bounce. Repeat across several magazines and ammo types. If the same malfunction repeats, stop and inspect sear engagement and spring tension before firing more.
Which compatibility factors affect super safety reliability?
The main ones are lower receiver geometry, bolt carrier group dimensions, and trigger pin hole spacing. Tolerance stacking between an aftermarket lower and a mil-spec BCG can cause binding. Check that your safety selector rotates freely and the disconnector clears the sear. Confirm your buffer weight and spring rate match your barrel length and gas system.
How should a super safety component be inspected and maintained?
Inspect the sear and disconnector faces for wear or rounding, check spring tension, and look for galling on the camming surface. Clean carbon from the trigger group every few hundred rounds. Apply lubricant to friction points, not the sear engagement surfaces, which should stay dry. Replace springs at the first sign of weakness.
What are common signs of an unreliable firearm component?
Watch for inconsistent trigger reset, a mushy or variable pull weight, failures to fire on reset, and unusual wear patterns on the sear or hammer. Bolt bounce and erratic ejection also point to timing or buffer issues. Any of these means stop shooting and diagnose before the problem compounds.
When should a qualified gunsmith inspect a super safety setup?
Bring in a gunsmith if you see cracked or deformed parts, if the safety selector binds after tuning, or if malfunctions persist after spring and buffer swaps. Also get a professional inspection if you are unsure about legal compliance in your state, since some configurations are restricted. Safety and legality are worth the expert fee.