Last Updated: November 1, 2026
Quick Summary
To measure pistol trigger weight accurately, first confirm the gun is unloaded, then use a trigger pull gauge hooked at the same point on the trigger face, pulling straight back parallel to the bore. Take at least three readings, read the value at the moment of break, and average them.
- Confirm the pistol is unloaded and the chamber is clear before any measurement.
- Use a stable rest such as a padded vise so the frame cannot move during the pull.
- Keep the gauge hook on the same trigger contact point and pull straight back, parallel to the bore.
- Read the value at the exact moment of break, not after the trigger has traveled further.
- Take at least three readings, average them, and measure single-action and double-action pulls separately.
Table of Contents
- What Trigger Pull Weight Measures and Why It Matters
- Safety First: Clearing and Preparing the Pistol
- Digital Trigger Pull Gauge vs. Mechanical Gauge: Which to Use
- How to Use a Trigger Pull Gauge Step by Step
- Single-Action vs. Double-Action Trigger Pull: What Changes
- Trigger Pull Gauge Accuracy and Taking Repeatable Readings
- Booking Your Next Upgrade and Getting Flatties Ready to Install
- Frequently Asked Questions
Measuring pistol trigger weight accurately comes down to three things: a safe, unloaded firearm, a proper trigger pull gauge, and repeatable technique. Get the measurement right and you can tell whether a trigger is ready for competition, defensive use, or a upgrade. Get it wrong and you are guessing.
The National Institute of Standards and Technology publishes a best-practice procedure for measuring trigger pull on rifles, shotguns, pistols, and revolvers. It recommends at least three measurements per firearm when possible (NIST best practice for measuring trigger pull of firearms). That single recommendation shapes everything that follows in this guide.
What Trigger Pull Weight Measures and Why It Matters
Trigger pull weight is the force, usually in pounds or ounces, needed to move the trigger to the point where the gun fires. A lighter pull feels crisp. A heavier pull feels stiff. Neither tells you the whole story on its own.
Trigger weight alone does not establish how hard a firearm is to discharge (Archived | Firearms Examiner Training | Trigger Pull Measurements). The National Institute of Justice describes trigger pull as a measurement that helps inform that question, not a complete answer by itself (NIJ firearms examiner training on trigger pull measurements).
Here is what a trigger pull reading can tell you:
- Whether the trigger matches the spec you expected
- Whether a new drop-in kit actually changed the pull
- Whether the trigger is consistent from shot to shot
- Whether it is too light for safe carry or too heavy for precise shooting
Safety First: Clearing and Preparing the Pistol
Treat every firearm as loaded until you confirm it is not. Do this before any measurement.
- Point the muzzle in a safe direction at all times
- Remove the magazine and check that it is empty
- Lock the slide back and visually inspect the chamber
- Check the barrel from the breech end to confirm it is clear
- Keep your finger off the trigger until the gauge is in place
Watch out: Do not dry-fire a pistol to “test” the trigger without a clear, verified chamber and a safe backstop. Measure with a gauge only.
Digital Trigger Pull Gauge vs. Mechanical Gauge: Which to Use
Two tool types dominate. A digital gauge reads the force on a small display. A mechanical gauge uses a spring or a hanging weight and a scale you read by eye. Digital gauges are faster to read and reduce reading error. Mechanical gauges are cheaper and do not need batteries.
Gauge accuracy matters more than the style you pick. Check the resolution and calibration documentation before you trust the number. For current pricing, visit the Poly Pew website or request a quote.
Best for: Shooters who want quick, clear digital readouts and repeatable numbers.
Skip if: You need a permanent shop reference with no batteries and no electronics.
How to Use a Trigger Pull Gauge Step by Step
A repeatable procedure is the difference between a number you can trust and a number you have to guess about. The steps below are written for pistols specifically, because the short trigger travel, the frame geometry, and the safety rules all differ from rifles and shotguns. Run the same sequence every time so readings from different days and different guns can be compared.
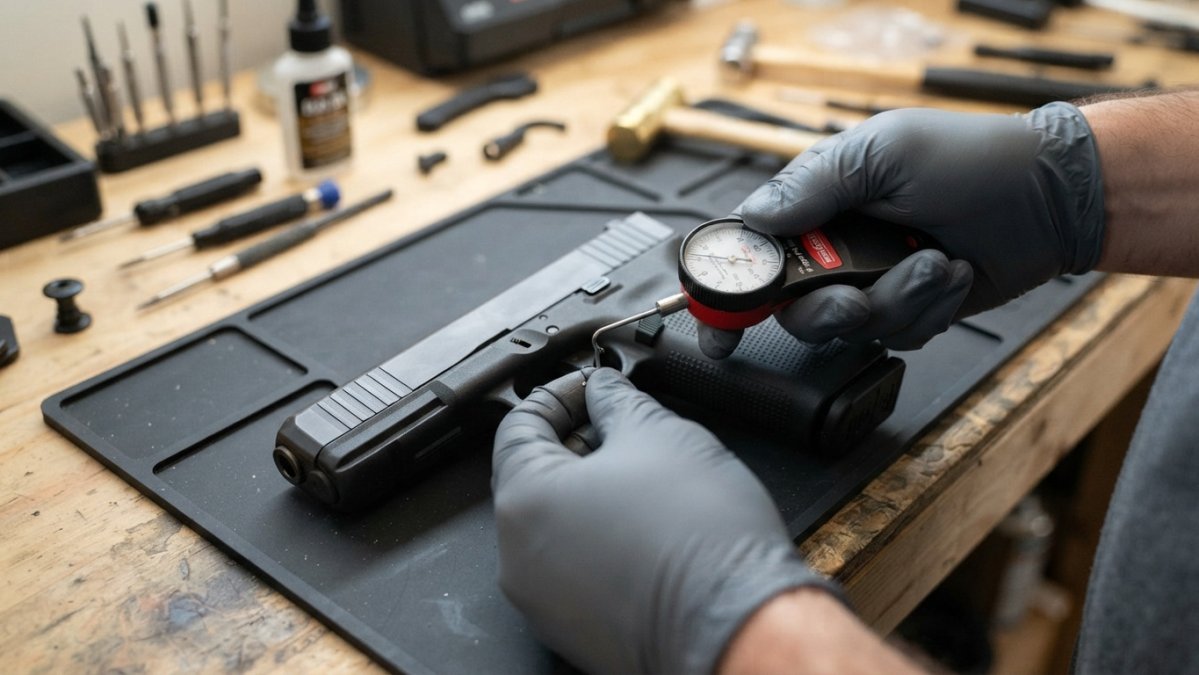
Complete the clearing steps in the safety section before you attach any gauge. Keep ammunition out of the work area, keep the muzzle pointed in a safe direction, and follow the pistol manufacturer’s manual for any gun you test.
- Confirm the pistol is unloaded and the chamber is clear. Remove the magazine, lock the slide back, and visually and physically inspect the chamber and breech. Do not proceed until you have confirmed it.
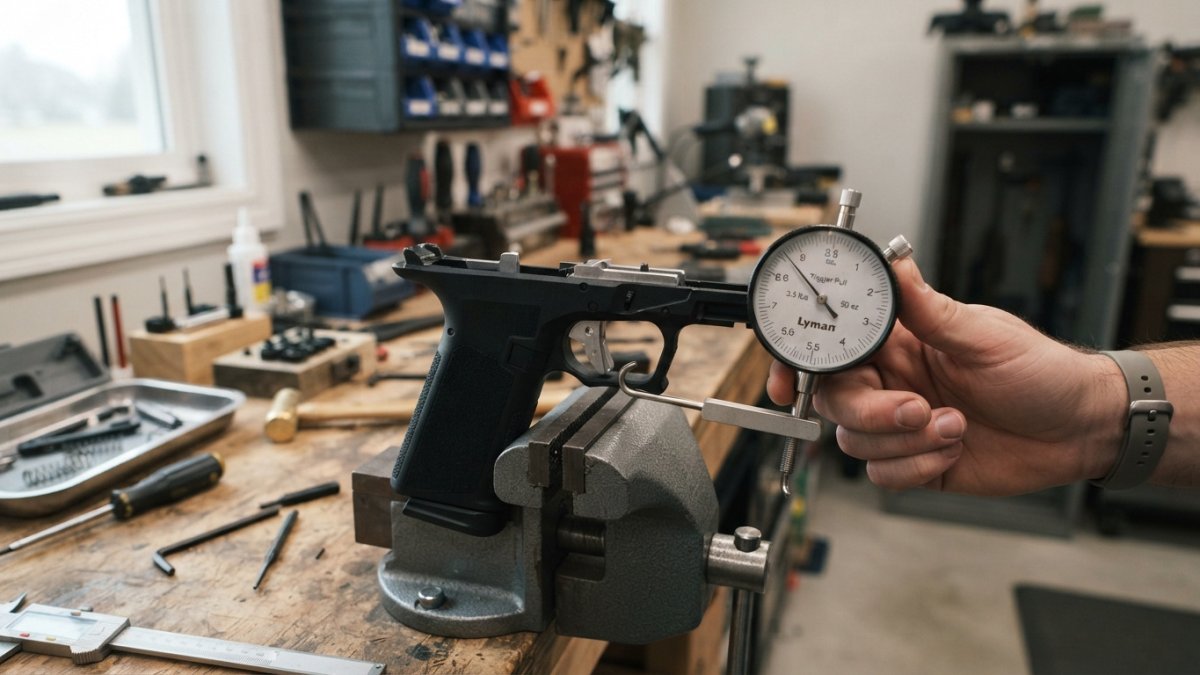
- Set up a stable rest. Place the pistol in a vise with padded jaws or on a firm bench rest so the frame cannot move during the pull. A pistol that shifts under load adds force to the reading and makes the number meaningless.
- Identify the trigger face contact point. Mark or note where your index finger normally rests on the trigger face. The gauge hook goes on that same spot every time. Moving the hook up or down the trigger face changes the leverage and changes the reading.
- Align the gauge with the bore. Hold the gauge so the hook pulls parallel to the bore axis, straight back toward the rear of the frame. Do not pull up, down, or to the side. An angled pull reads higher and varies from shot to shot.
- Take up any slack, then pull smoothly. For a single-action or striker-fired pistol, take up the pre-travel until you feel the wall, then increase force smoothly until the break. For a double-action pistol, pull through the full stroke at a steady rate. Pull speed matters: a fast jerk reads higher than a slow, steady squeeze, so pick one pace and keep it.
- Read the value at the exact moment of break. Note the number the instant the hammer or striker releases, not after the trigger has traveled further. On a digital gauge, watch the peak-hold value. On a mechanical gauge, watch the pointer at the break.
- Record the reading and reset. Write down the number, then reset the trigger to its starting position before the next pull. Do not stack pulls or short-stroke the trigger between readings.
- Repeat at least three times, then average. Take a minimum of three readings, more if they are spread out. Calculate the average and note the high and low so you can see the spread.
If your readings vary by more than a few ounces, stop and check the setup before you blame the trigger. Loose vise jaws, a shifting hook, and an inconsistent pull pace are the usual culprits.
A common mistake is pulling the gauge at an angle or letting the pistol move in the rest. Both read higher and inconsistent. Keep the pull straight back, keep the frame still, and keep the pace the same every time.
The steps below each have a clear action, and the most common mistakes are listed here for quick reference.
| Step | What to do | Key note |
|---|---|---|
| 1. Confirm unloaded | Remove magazine, lock slide, inspect chamber | Do not proceed until confirmed |
| 2. Set up rest | Secure pistol in padded vise or bench rest | Frame must not move during pull |
| 3. Mark contact point | Note where index finger rests on trigger face | Hook stays on the same spot |
| 4. Align gauge | Pull straight back, parallel to bore | Angled pulls read higher |
| 5. Pull smoothly | Take up slack, then steady pull | Keep one pace throughout |
| 6. Read at break | Note value at the moment of release | Use peak-hold on digital gauge |
| 7. Record and reset | Write reading, reset trigger fully | Do not stack or short-stroke pulls |
| 8. Repeat and average | Take at least three readings, average them | Note high and low spread |
Single-Action vs. Double-Action Trigger Pull: What Changes
The action type changes what you are actually measuring, and it changes how you should report the result. Treat each action type as its own measurement problem rather than assuming one number describes the whole trigger.
Single-action (SA). A single-action trigger, such as a 1911 or a typical match pistol, has one consistent break point once the hammer is cocked. You are measuring the force to release the hammer from the cocked position. Take up the pre-travel to the wall, then measure the break. Report this as the single-action pull weight.
Double-action (DA). A double-action trigger moves the hammer through a longer first stroke before it breaks. The first stroke reads heavier than the second because you are compressing the mainspring and rotating the hammer through the full arc. Measure the double-action stroke separately from the single-action stroke, and report both numbers. Do not average a double-action reading with a single-action reading; they describe different events.
Double-action/single-action (DA/SA). These pistols have both a double-action first shot and a single-action subsequent shot. Measure and report the double-action pull and the single-action pull as two separate figures. A single average across both stages hides the difference that matters most to a shooter.
Striker-fired. A striker-fired pistol uses a striker rather than a hammer, and the trigger stroke may include a safety blade, a pre-travel stage, and a wall before the break. Measure the force at the break, and note whether the pistol has a trigger safety blade that the gauge hook must depress. If the hook does not fully depress the blade, the reading will be wrong or the pistol will not release.
Trigger stage and reset. For any action type, measure from the same starting point each time. If the trigger has a distinct wall, take up the slack to the wall before you begin the measured pull. After the break, let the trigger reset fully before the next pull. Measuring from a partially reset trigger gives a short, light reading that does not reflect a real shot.
Measure and report each relevant pull separately: single-action, double-action, and striker-fired break. A single number cannot describe a trigger that has more than one stage.
Compare readings only within the same action type and the same stage. A double-action pull from one pistol and a single-action pull from another are not comparable numbers, even if both are quoted in pounds.
Trigger Pull Gauge Accuracy and Taking Repeatable Readings
Repeatability is what separates a useful measurement from a random number. Take at least three readings and check whether they land close together. If they vary widely, something is inconsistent, either your pull or the gauge placement.
Common sources of error include:
- Pulling the gauge at an angle
- Placing the hook at different points on the trigger
- Reading the value after the break instead of at it
- Using a gauge that is out of calibration
If your readings keep drifting, adjust your technique before you adjust the trigger. Changing pull weight is a separate task, and a guide on how to adjust trigger pull weight safely covers when to stop and consult a gunsmith.
Booking Your Next Upgrade and Getting Flatties Ready to Install
Once you know your baseline weight, you can decide whether an upgrade makes sense. Compare the broader options first in our guide to trigger upgrades that work. If you go with a drop-in kit, our step-by-step drop-in trigger installation guide walks through the process.
Measure before, measure after, and you will know exactly what changed.
Frequently Asked Questions
How many readings should you take when measuring trigger pull weight?
Taking at least three measurements per firearm when possible is a sound practice. Taking three or more readings lets you see how much the result varies from pull to pull. Average the readings, and treat a single high or low result as a sign that your pull, your gauge position, or both need attention before you trust the number.
How accurate are digital trigger pull gauges?
Digital gauges are useful for repeatable comparisons, but no gauge tells you a single definitive value on its own. Repeated readings help show how much a measurement varies. Check your gauge’s stated resolution, take several pulls, and compare results over time rather than relying on one number.
Can you measure trigger pull weight without a gauge?
A dedicated gauge gives the most consistent results. Improvised methods such as hanging weights from the trigger are harder to repeat and make the reading less reliable. If you use a gauge, keep the contact point and pull direction the same every time so your readings can be compared.
What is the difference between single-action and double-action trigger weight?
A single-action pull only releases the hammer or striker, so the trigger weight is usually lighter and more uniform. A double-action pull also cocks the hammer, which normally makes the first pull heavier and longer. Measure each mode separately and note which one you are testing, because the numbers will not be directly comparable.