Last Updated: November 2, 2026
Quick Summary
To deep clean handgun at home safely, first unload it, remove the magazine, and physically check the chamber with your finger before touching any tool. Then field strip the pistol, set up a ventilated workspace away from ammunition, and clean the barrel, bore, feed ramp, slide, frame, and recoil spring before reassembling and running a function check.
- Remove all ammunition from the room, not just off the bench, before cleaning.
- Field strip to slide, frame, barrel, and recoil spring; skip detail-stripping at home.
- Use a caliber-matched bore brush, jag, patches, solvent, and lubricating oil.
- Wipe polymer frames instead of soaking them, since some solvents attack polymer.
- Apply oil sparingly; excess oil in the firing pin channel attracts dust and causes light strikes.
Table of Contents
- Safety Check: Unload and Clear Your Handgun
- Field Strip Your Pistol: Know Your Model’s Limits
- Set Up a Safe, Ventilated Workspace
- The Best Gun Cleaning Kit for Beginners
- Clean the Barrel, Bore, and Feed Ramp
- Scrub the Slide, Frame, and Recoil Spring
- How to Clean a Gun After Range Day vs. Deep Clean
- Firearm Maintenance Best Practices and Reassembly
- Frequently Asked Questions
Safety Check: Unload and Clear Your Handgun
Every deep clean handgun session starts with the same non-negotiable step: make the gun safe. A handgun is only safe to work on when it is unloaded, the magazine is out, and you have physically checked the chamber. Do this every single time, even if you “know” it’s empty.
Here’s the sequence to follow before any cleaning starts:
- Point the muzzle in a safe direction.
- Drop the magazine and set it aside.
- Lock the slide back and look inside the chamber.
- Feel the chamber with your finger to confirm it’s empty.
- Remove all ammunition from the room.
That last step matters more than most people think. Ammunition sitting on the bench is how accidents happen.
Watch out: Never trust a gun because someone told you it was clear. Verify it yourself, every time, before you touch a cleaning tool.
Field Strip Your Pistol: Know Your Model’s Limits
Not every pistol field strips the same way, and that’s where a lot of first-timers get stuck. A field strip means taking the gun down to its main parts for cleaning: slide, frame, barrel, and recoil spring. It does not mean pulling the trigger group apart.
Know your model’s limits before you start. Glock-pattern pistols, for example, field strip with a simple slide pull and takedown lever press. Hammer-fired guns and some clones need a different sequence. Check your owner’s manual, not a random video.
What most guides miss is this: some pistols should not be detail-stripped at home at all. Pushing pins and removing fire control parts can damage springs or void a warranty if you don’t know what you’re doing.
Stick to a field strip for routine cleaning. If you want to go deeper into the trigger group, that’s a separate job with its own steps.
Set Up a Safe, Ventilated Workspace
Good lighting and airflow turn a frustrating chore into a quick job, but the workspace is also where most home cleaning accidents and solvent exposures actually happen.
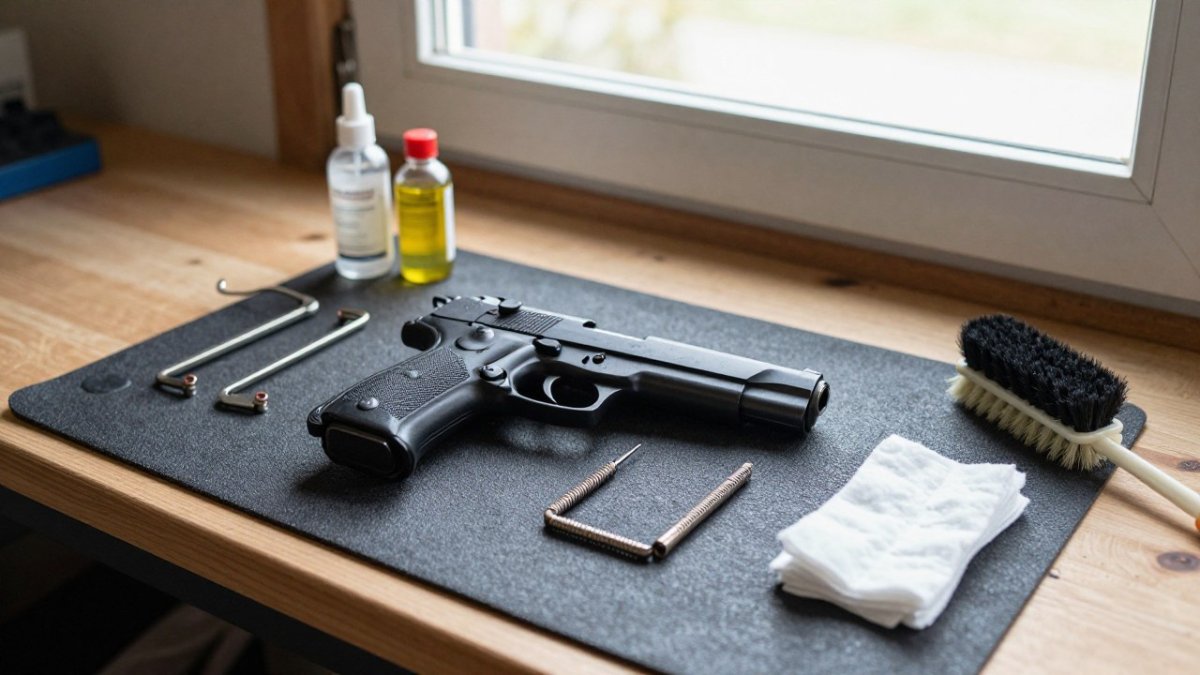
Light the work, not just the room. You need enough light to see carbon in the slide rails and to spot corrosion or a worn spring.
Control the air. Solvents and aerosol lubricants give off vapors, and a closed room concentrates them.
Protect yourself. Nitrile gloves keep solvent off your skin, and eye protection matters because springs launch and solvents splash when you push a brush through a bore.
Keep ammunition out of the workspace entirely. Not just off the bench, out of the room.
Manage solvent-soaked waste. Used patches, swabs, and rags hold solvent and oil, and they can spontaneously heat if piled together.
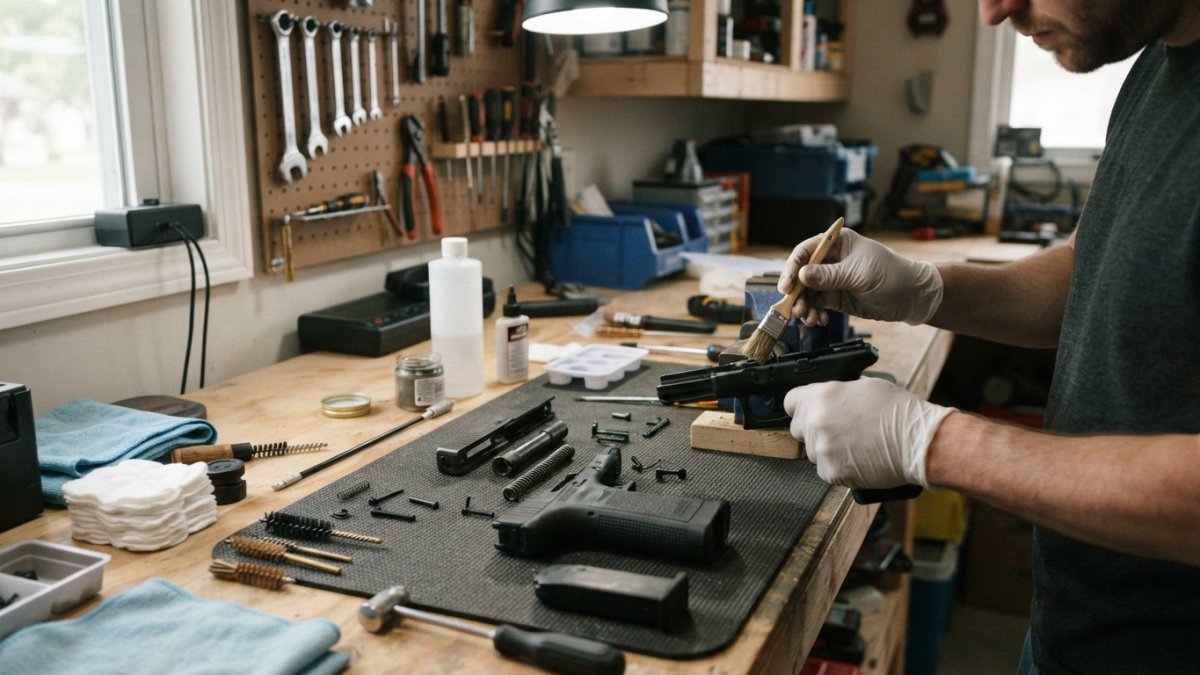
Your workspace should have:
- A dedicated mat to catch small parts and soak up drips
- Good overhead light so you can see carbon and wear
- Open airflow because solvents put off fumes
- Eye protection for splashes and spring launches
- No food, drinks, or ammo on the bench
Keep a small tray or magnetic dish for pins and springs. Those parts love to roll under the bench and disappear.
Watch out: Never leave a disassembled handgun unattended on a bench, even briefly, a part can be lost, or someone can walk in and pick up a gun that isn’t assembled or checked.
The Best Gun Cleaning Kit for Beginners
The best gun cleaning kit for beginners is a simple, caliber-matched set that covers the basics without a drawer full of gadgets you’ll never use. You need a cleaning rod, bore brush, jag, patches, solvent, lubricating oil, and a few cotton swabs.
Skip the giant kits with forty attachments. Start with these essentials:
- Cleaning rod sized to your barrel
- Bore brush in the right caliber
- Patch holder or jag plus a bag of cotton patches
- Solvent for carbon and powder residue
- Lubricating oil for moving parts
- Cotton swabs and a rag for nooks and crannies
- Nitrile gloves to keep solvent off your skin
A common mistake is buying a brush in the wrong caliber. Match it to your gun’s bore or you’ll either scrub nothing or jam the brush.
Clean the Barrel, Bore, and Feed Ramp
The barrel, bore, and feed ramp collect the most fouling, so give them the most attention. Run a wet patch through the bore first, let it soak, then scrub with the bore brush.
Here’s the routine:
- Wet a patch with solvent and push it through the bore from chamber to muzzle.
- Let it sit a few minutes to soften carbon.
- Run the bore brush through several passes.
- Follow with dry patches until they come out clean.
- Wipe the feed ramp with a solvent-dampened swab.
The feed ramp is where rounds slide into the chamber. Caked-on residue there causes feeding problems, so don’t skip it. A little scrubbing goes a long way.
Scrub the Slide, Frame, and Recoil Spring
Carbon hides in the slide rails, around the firing pin channel, and on the frame. Wipe down every surface you can reach, then scrub the tight spots with a brush or swab.
Focus on:
- Slide rails where the slide rides on the frame
- The breech face where the case head sits
- The extractor area, which collects grit
- The recoil spring, wiped clean and checked for kinks
While you scrub, look for wear. A frayed recoil spring or a chipped extractor is a sign it’s time to swap parts.
Watch out: Don’t soak polymer frames in solvent. Some solvents attack polymer, so wipe and move on rather than letting parts sit wet.
How to Clean a Gun After Range Day vs. Deep Clean
A quick wipe-down after the range is not the same as a deep clean handgun session. Knowing the difference saves you time and prevents over-cleaning, which is a real problem, scrubbing a bore that doesn’t need it wears the rifling faster than shooting does.
After range day, you mainly need to remove fresh powder residue and re-oil the moving parts. A deep clean goes further: full field strip, bore scrubbing, and a close inspection of every part.
| Task | After Range Day | Deep Clean |
|---|---|---|
| Field strip | Sometimes | Always |
| Bore brush and patches | Quick pass | Full scrub until clean |
| Feed ramp and breech face | Wipe | Scrub and inspect |
| Slide rails and frame | Re-oil | Clean and re-lubricate |
| Full parts inspection | No | Yes |
| Time needed | A few minutes | A longer session |
Cleaning frequency by use and conditions. There is no single round count that fits every handgun, but a common pattern among practitioners is:
- Range gun, fair weather: a quick wipe-down and re-oil after each session, with a deep clean every few hundred rounds or when accuracy or cycling feels off.
- Carry gun: wipe down and re-oil more often, because lint, dust, and body moisture collect in the slide and around the firing pin. A carry gun that rides against skin all day needs attention weekly or after any heavy sweat, not just after shooting.
- Storage gun: a light coat of oil on metal surfaces and a check every few months. A gun stored long-term in a humid space needs more frequent inspection than one in a climate-controlled safe.
- Dusty, humid, or wet conditions: clean and re-oil after exposure. Moisture is the enemy of steel, and a gun that got rained on or carried through dust should be field stripped and dried the same day.
How to recognize over-cleaning and damage. Normal residue is a thin, even layer of black carbon and powder fouling that wipes off with solvent. What you should flag instead:
- Corrosion, reddish-brown or white powdery spots on the slide, frame, or bore. Clean it off, oil the surface, and check again in a week; if it returns, the finish or storage conditions need attention.
- Worn parts, a recoil spring that has lost tension or is kinked, a chipped extractor, or a firing pin that doesn’t move freely. These are replacement items, not cleaning problems.
- Damaged springs, a spring that is compressed shorter than a new one, or that binds, should be replaced rather than cleaned.
- Persistent malfunctions, failures to feed, extract, or fire that continue after a clean and proper lubrication point to a mechanical issue. Stop cleaning and have a qualified gunsmith inspect the gun.
Watch out: Over-lubrication is as common a mistake as under-cleaning. Excess oil in the firing pin channel or on the breech face attracts dust and can cause light strikes or sluggish cycling, so apply oil sparingly to the points the manufacturer specifies and wipe off the rest.
When to stop and call a gunsmith. If a part won’t come free with normal field-strip pressure, if you see cracks in the frame or slide, or if the gun fails a function check after reassembly, don’t force it.
Firearm Maintenance Best Practices and Reassembly
Good firearm maintenance best practices come down to three things: clean, lubricate, and check function. Reassemble in reverse order, then run a function check before you load anything.
Put the pistol back together:
- Slide the barrel and recoil spring back into the slide.
- Seat the slide on the frame.
- Rack it and confirm it cycles smoothly.
- Do a function check with an empty gun.
- Wipe off excess oil and store it properly.
Lubricate the moving parts lightly. Too much oil attracts dust and grit, which is worse than too little.
If you run an aftermarket trigger, follow the manufacturer’s maintenance guidance to keep it reliable. This guide to maintaining aftermarket triggers for duty carry lays out a maintenance schedule and safety checks. And if you’re thinking about upgrades, check the manufacturer’s recommendations for when a worn component should be replaced. This guide on when to replace firearm internal components covers round counts, wear signs, and maintenance schedules.
Frequently Asked Questions
What can I use at home to clean my firearm?
Stick to purpose-made products: a solvent for carbon and fouling, a lubricating oil for moving parts, a cleaning rod, bore brush, patches, cotton swabs, and a rag. Household items like paper towels and old toothbrushes can help with scrubbing, but avoid WD-40, hydrogen peroxide, and harsh household cleaners. These can strip protective finishes, attract dust, or damage metal.
How often should I deep clean my handgun versus a field strip?
There is no universal schedule. A common approach is a quick field strip and wipe-down after every range trip, with a full deep clean every few hundred rounds or every few months, depending on use and conditions. If you shoot in dusty or humid environments, clean more often. Look for caked-on residue, sluggish slide movement, or visible fouling as signs it is time for a deep clean.
Is it safe to use an ultrasonic cleaner for handgun parts at home?
Ultrasonic cleaners can remove fouling from metal parts, but they are not safe for all materials. Polymer frames, some finishes, and certain springs can be damaged by heat or cleaning solutions. Check your manufacturer’s guidance before submerging any part. For most home users, manual cleaning with a brush, solvent, and patches is safer and sufficient. Reserve ultrasonic cleaning for metal components you know are compatible.
How do you safely handle a firearm during the cleaning process?
Always treat the firearm as loaded until you have visually and physically checked the chamber and magazine well. Remove ammunition and magazines from the workspace before you start. Keep the muzzle pointed in a safe direction, wear eye protection, and work in a ventilated area away from children and pets. Never smoke or eat while cleaning. Once reassembled, perform a function check with the gun unloaded.
A clean handgun is a reliable handgun, and the right parts keep it that way. At Poly Pew, we build precision-engineered components for shooters who care about how their platform runs, from durable aluminum MKE lowers to drop-in triggers and Super Safety kits. Every part is made for compatibility and tested reliability, so your build holds up after every cleaning and every range trip. Get your Flatties here and keep your platform running the way it should.