Last Updated: November 8, 2026
Quick Summary
You check trigger pull consistency by taking five readings with a trigger pull gauge and comparing how tightly they cluster. Clamp the firearm so it cannot move, place the gauge on the exact spot where your finger pad rests, and pull straight back until the trigger breaks. A healthy trigger produces five readings that cluster tightly together.
- The five-pull check takes about fifteen minutes and needs no special shop setup.
- Zero your digital gauge or check your mechanical scale’s starting point before you begin.
- Read the gauge at the exact moment of the break, not after the full stroke.
- A trigger reading 3.0, 3.1, 3.0, 3.2, 3.1 has a mean of 3.08 and a range of 0.2 lbs.
- Repeat your five pulls on a second firearm you trust to rule out gauge error.
Table of Contents
- How to Check Trigger Pull Consistency at Home: The Five-Reading Protocol
- Choosing a Trigger Pull Gauge: Digital vs. Mechanical
- How to Pull Trigger Straight Back for a Clean Reading
- Quantifying Variation: Range, Mean, and Spread
- Separating Gauge Error from Firearm Variation
- Inconsistent Trigger Pull Troubleshooting
- Model-Specific Safety and Measurement Limits
- Log Your Readings and Verify Your Build Before the Next Match
- Frequently Asked Questions
How to Check Trigger Pull Consistency at Home: The Five-Reading Protocol
Trigger pull consistency is the measure of whether your trigger breaks at the same weight every time, and you check it by taking five readings with a gauge and comparing how tightly they cluster. Accuracy problems are often traced to a wandering trigger, more than to almost any other part. A trigger that breaks at 3 lbs, then 3.8, then 2.6 wrecks your groups no matter how good your fundamentals are.
Here is a protocol for checking your trigger. It takes about fifteen minutes and needs no special shop setup.
Step 1: Confirm the Firearm Is Unloaded and Clear
Safety comes before measurement, every single time. Remove the magazine, open the action, and look into the chamber with your own eyes. For a revolver, swing out or remove the cylinder and check every chamber. Keep all live ammunition in another room. A trigger gauge pulls a real trigger, and the only safe version of this job happens on a firearm you have personally cleared.
Step 2: Set Up the Firearm and Gauge
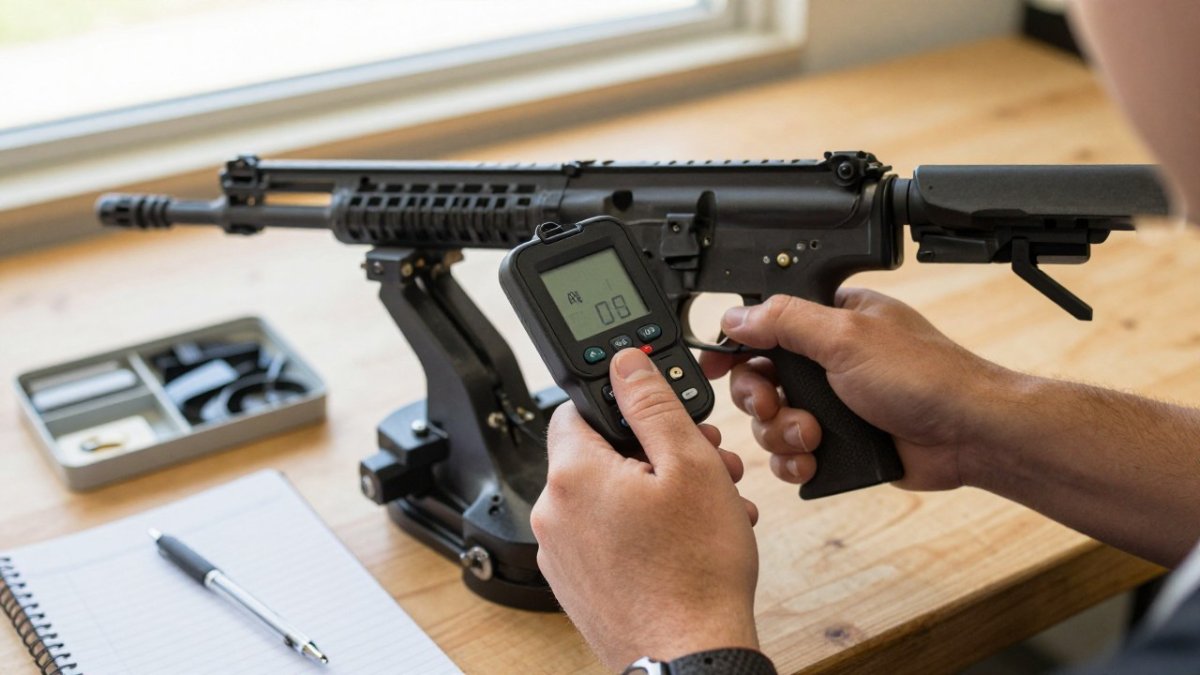
Clamp the firearm in a vise or rest it firmly so it cannot move during the pull. Any shift in the gun adds error to your reading. Zero your digital gauge or check your mechanical scale’s starting point before you begin. According to NIST’s best practice recommendation for measuring trigger pull, revolvers need their measurement verified across all cylinder positions before formal testing, so plan for that extra step if you shoot a wheelgun.
Step 3: Position the Gauge on the Trigger Face
Place the gauge’s sensor face on the exact spot where your finger pad rests. The NIJ firearms examiner training on trigger pull measurement notes that the best data comes from suspending weight at that natural finger position. Keep the gauge perpendicular to the trigger face. Angling it sideways pushes the trigger at an offset and inflates your reading.
Step 4: Pull Straight Back and Record the Break Weight
Apply steady pressure straight back until the trigger breaks. Read the gauge at the exact moment of the break, not after the trigger has traveled through its full stroke. Write the number down before you reset for the next pull. Do not round it in your head or “adjust” it because it looked off. The whole point is honest data.
Step 5: Repeat Five Times and Compare the Readings
Five pulls is the standard, and the readings should cluster tightly together on a healthy trigger (MyGunDeal’s 2026 gauge guide). If one reading sits far from the rest, that is your signal. For practical tips on achieving a consistent pull weight, see consistent trigger pull weight. For a deeper look at finger placement and grip control that affect your numbers, read our guide on consistent trigger pull weight.
Choosing a Trigger Pull Gauge: Digital vs. Mechanical
Digital gauges offer precision and repeatability, while mechanical spring gauges offer simplicity. Digital models give you a precise number, store readings, and remove the guesswork of reading a needle. Mechanical gauges still work fine for a quick sanity check. The trade-off is needle reading error and spring wear over time.
| Gauge Type | Best For | Typical Range | Watch Out For |
|---|---|---|---|
| Digital load-cell | Benchwork, record keeping, low pulls | 0-20 lbs, some to 0.1 oz resolution | Accuracy questions below 8 oz; battery drift |
| Mechanical spring | Budget checks, field use | 0-10 lbs or 0-32 oz | Spring fatigue, needle reading error, parallax |
| Trigger weight scale (hanging weight) | Verification and calibration checks | Fixed known weights | Slow to use; limited to the weights you own |
Mechanical spring gauges are fine for a quick check, but a spring that has been compressed thousands of times will read low, and a needle viewed off-axis adds parallax error.
Some shooters question digital accuracy at extremely light pulls under 8 oz. If you run a match-grade bolt gun, test your gauge against a known weight first. Hang a known weight, a calibrated 8 oz or 1 lb test weight, or a scale-checked object, from the gauge and confirm the reading. Do this at the start of every session, not once a year.
If you are stocking a bench from scratch, our list of essential firearm maintenance tools for beginners covers the rest of the kit.
How to Pull Trigger Straight Back for a Clean Reading
A straight-back pull means pressure goes rearward along the trigger’s travel path with zero sideways load. Any lateral force drags the trigger against its channel and adds friction to your reading. Keep your wrist relaxed and let the gauge do the work.
- Line the gauge up with the trigger’s natural path
- Apply slow, steady pressure, not a jab
- Stop the moment the trigger breaks
- Reset fully between pulls
Watch out: yanking the gauge like you are shooting fast will spike your numbers and make a good trigger look inconsistent.
Quantifying Variation: Range, Mean, and Spread
Variation is the gap between your highest and lowest reading, and it tells you more than any single pull. Take your five numbers and calculate three things: the mean, the range, and the spread from the average. A trigger reading 3.0, 3.1, 3.0, 3.2, 3.1 has a mean of 3.08 and a range of 0.2 lbs. That is tight. A trigger reading 2.8, 3.4, 3.0, 3.6, 2.9 has the same rough average but a 0.8 lb range. That one needs attention.
Separating Gauge Error from Firearm Variation
Before you blame the trigger, rule out the gauge. Repeat your five pulls on a second firearm you trust and compare the spread. If the same gauge wanders on both guns, the gauge is the problem. Check calibration, battery, and sensor contact. If the trusted gun reads tight and your build reads wide, the variation lives in the firearm.
Common culprits inside the gun:
- A rough or burred trigger sear
- Loose trigger pins or housing
- Debris in the trigger mechanism
- A worn or mismatched spring
Inconsistent Trigger Pull Troubleshooting
Inconsistent trigger pull troubleshooting starts with the simplest cause and works inward, and the key is to change one variable at a time so you know what fixed it. Most wandering triggers trace back to grit, a loose pin, or a spring that has seen better days, but before you touch the gun, rule out the operator and the gauge.
Work this flow in order:
- Re-run the five-pull protocol with the same gauge and the same setup. If the spread tightens, the first session had a technique or setup error, not a gun problem.
- Repeat on a second firearm you trust. If the same gauge wanders on both guns, the gauge is the problem. Check calibration against a known weight, battery, and sensor contact.
- Check the setup. Confirm the firearm cannot shift in the vise, the gauge is perpendicular to the trigger face, and the sensor sits at the same finger position every pull. A gauge that slides on the trigger face will produce a wide range even on a good trigger.
- Clean and inspect the trigger group. Debris in the sear or housing is the most common mechanical cause of a wandering break.
- Check fasteners and pins. Loose trigger pins or housing screws let the group move under load and change the break weight.
- Examine sear engagement and springs. A rough or burred sear, a worn or mismatched spring, or a fresh install that is not seated correctly will all show up as variation.
If readings swing after a fresh install, confirm the trigger is seated correctly and the safety functions. Our 7-step guide to preventing firearm trigger failure walks through reset issues and safe handling checks. If the swing traces to pull weight settings, read how to adjust trigger pull weight safely before you touch a screw.
Keep a simple log so the diagnosis has data behind it. Record the date, firearm, gauge, all five readings, the mean, and the range. A template like this turns a vague “it feels inconsistent” into a trend you can compare across sessions:
| Date | Firearm | Gauge | Pull 1 | Pull 2 | Pull 3 | Pull 4 | Pull 5 | Mean | Range |
|---|---|---|---|---|---|---|---|---|---|
Watch out: do not change two things at once, a new spring and a cleaned sear in the same session, or you will not know which one fixed the variation.
Model-Specific Safety and Measurement Limits
Not every platform measures the same way. Striker-fired pistols often need the trigger safety blade depressed for a true reading, and some gauges cannot do that cleanly. Revolvers demand a check at every cylinder position. Bolt actions measure in ounces, not pounds, and competitive bolt guns often run under 4 oz (TriggerTech’s 2026 industry benchmarks). Competitive semi-auto triggers typically land between 1.5 and 3 lbs. Know your platform’s normal range before you judge a number.
Log Your Readings and Verify Your Build Before the Next Match
Write every session down: date, firearm, gauge, all five readings, and the mean. A simple log turns guesswork into a trend line. If your average creeps up over a few matches, you will see it before it costs you a stage. If a new trigger reads tight out of the box, you have proof it holds.
Consistent readings help you evaluate parts before you buy. If you want a trigger that holds consistent pull weight, see our drop-in trigger systems and Super Safety kits. For current prices, visit our website or request a quote.
Consistency is not luck. It is a protocol you repeat and a number you record. Get your Flatties here and build a trigger you can trust.
Frequently Asked Questions
How many measurements should you take to check trigger pull consistency?
Five readings is the standard for a consistency check. A quality trigger should produce five measurements that cluster tightly together. Record every reading, then compare the highest and lowest numbers. If the spread is wide relative to the average pull weight, something may be off: either your technique, the gauge, or the trigger mechanism itself. Repeat the five-pull string before drawing conclusions.
Why does my trigger pull weight vary between measurements?
Variation usually comes from three sources: gauge placement, pull technique, or the firearm. Placing the gauge at a different point on the trigger face changes leverage and skews the reading. Angling the pull instead of pulling straight back adds friction. On revolvers, verify consistency across all cylinder positions before formal testing, because timing differences can shift pull weight. Check technique first, then the firearm, before blaming the trigger.
Is a 4.5-pound or 2.5-pound trigger pull good?
It depends on the platform and use. A 2.5-pound pull is a common choice for competition setups, and a 4.5-pound pull is often preferred for duty and defensive setups where a heavier break is wanted. Bolt-action competition triggers run considerably lighter. What matters more than the number is consistency: a repeatable 4.5 pounds beats a 2.5-pound pull that swings two pounds between shots.
What is a good trigger pull gauge for checking consistency at home?
Digital trigger pull gauges give precise, repeatable readings compared to traditional weight-based methods. The tradeoff: some users question digital accuracy below 8 oz, so mechanical gauges may still have a place for very light bolt-action triggers. Whichever you pick, suspend the weight from the exact point where your finger naturally rests.